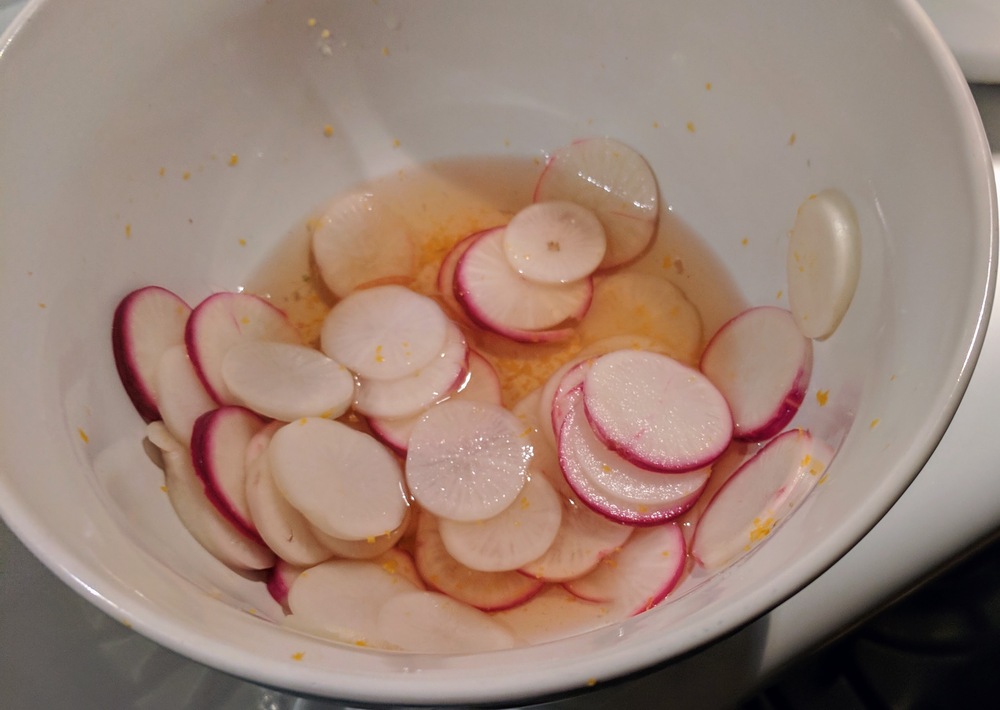
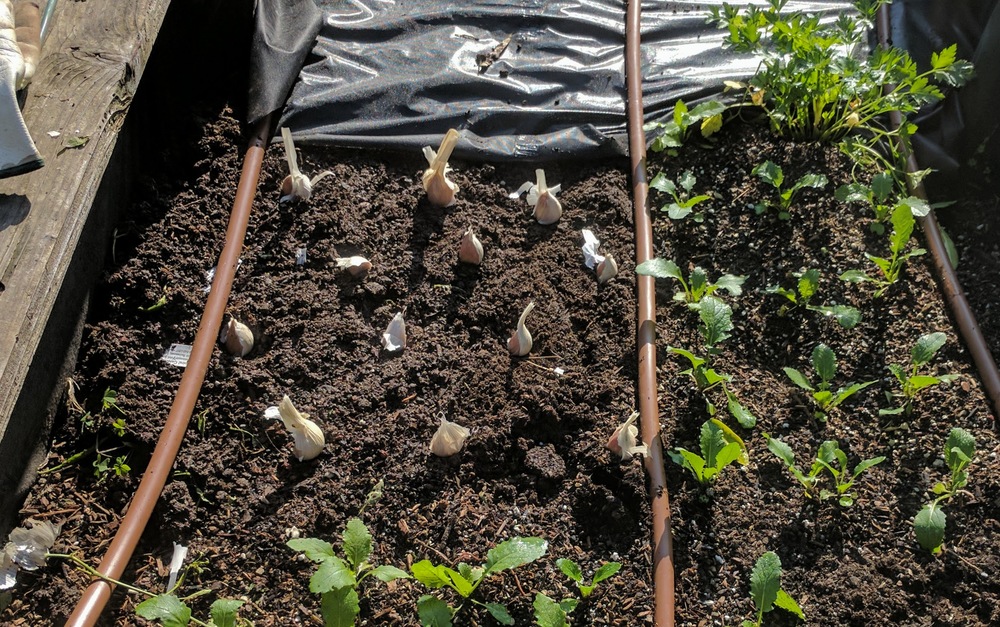
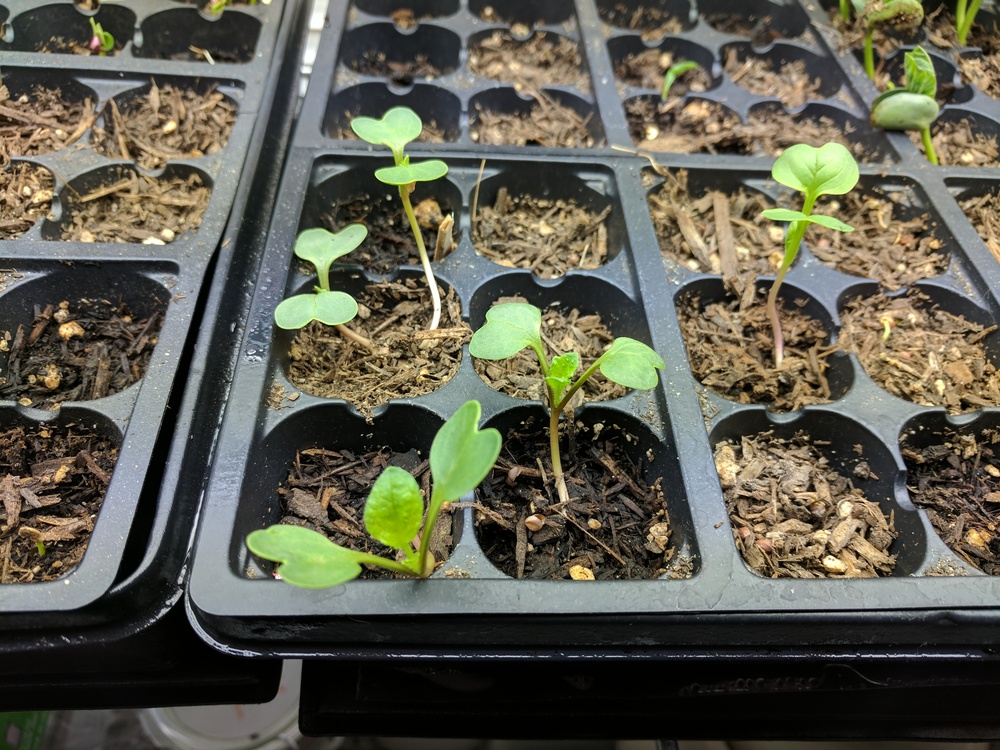
Archive | garden RSS feed for this section

Garden Frittata

10 Jun

Frittatas are my current go-to for an easy, satisfying dinner incorporating a lot of greens and whatever else is in the garden (it also makes great next-day leftovers, cold):

This particular evening I caramelized onions and fresh garlic (low heat, 15+ minutes?), sauteed morels in butter, and wilted chard and kale (cutting out the stems first and cooking them for a bit longer so they would soften). If I’m not in a hurry (e.g. already very hungry) I usually cook the components separately even though it dirties another pan or takes some extra time–  everything takes a different amount of time to cook well.

I pre-heated the oven to 375, and layered the (aliums, morels, greens) in the same cast iron skillet I used for the onions.

I whisked 8 eggs with salt and pepper and a little milk for several minutes / until very frothy and poured them into the skillet, then cooked this stovetop for 5 minutes or so to help brown and set the bottom (it’s not clear this is even needed– it’s just a force of habit).

Finally, I laid some big chunks of a soft cheese like goat chevre across the top and popped the whole thing in the oven for another 15-20 minutes, until the eggs puffed up and set.

IMG_20180516_190953_808

img_20180603_1333554777565611569415383.jpg

Artichokes (Grown, Blanched, Grilled)

4 Apr

Last spring I started some Colorado Star purple artichokes from seed and transplanted them into a strip of soil along a driveway. They started slow and didn’t produce any fruit last year, but here I am a year later:

While I’ve simply-boiled some later harvests (three rounds so far this spring) I cooked a first harvest of baby-size artichokes with an “oil and water” hybrid blanching method inspired by This Is Camino— simmering them in batches in a single-layer half-covered in water (with garlic, bay leaves, herbs, and olive oil) until mostly done, then finishing them on the grill while straining the liquid and reducing it to a sauce that reinforced the artichoke flavor:

Stir Fry w/ Rattail Radish + Snow Peas

12 Feb

A simple stir-fry– cooking a series of ingredients individually in a hot pan with peanut oil (some very briefly– just a minute or two), in this case:

  • onions + sliced garlic + minced ginger
  • rattail radish pods from the garden (incredibly prolific plants crank out the long slender pods– no much flavor but a nice juicy/crunchy component when harvested before the individual seeds start to bulge in the pods)
  • snow peas also from the yard (planted in the late fall, harvesting in February)
  • a bell pepper
  • pre-made mapo tofu (includes miso and chili flake)

I just mix them at the end with a little soy sauce and serve over rice (I sometimes add black vinegar, miso, and/or chili flake, but not this time as the tofu was already seasoned).

They teed up good fried rice the next day, too (with some scrambled egg and kimchi).

Growing Radishes

4 Feb

Last winter, spring, and again this winter I’ve grown a variety of radishes (almost all from Kitazawa Seed‘s excellent selection) in a raised bed in the back yard– a very easy crop (and one that can grow off-season in the Bay Area).

Just jotting down a few notes here from across the garden journal:

  • Japanese Scarlet Radish: Crisp, attractive, mild heat, grew fast, the healthiest of the plants, would grow again as a good salad radish or to eat fresh with butter and salt.
  • White Icicle Radish: Watery taste, fairly bland
  • Korean Good Luck Radish: Large– 2″ diameter and 5″ long. Stayed crisp, with some lingering heat (seemed to be from the skin). Had a lot issues with germination and seedling survival, though.
  • Chinese Mantanghong (Watermelon) Radish: Beautiful concentric circles of white and pink, quite spicy– but they all ended up a bit pithy and with a tough skin I had to peel off (I assume this means I left them in the ground too long or should have grown them earlier in the winter when it was even cooler, but it’s unclear).
  • Minowase Daikon: A lot of my seedlings died originally, but the ones that survived produced an excellent radish– long and firm– and in particular, with especially tasty greens (not raw, as they were a little prickly/spiny, but just a few minutes sauteed with garlic or added to a soup for its last few minutes on the stove and they were delicious). This year I’m growing more daikon to leave in the ground for a while, primarily for the greens– every few days we harvest another set of outer greens as a side dish for some meal.
  • Japanese Purple Radish (can’t remember where I got these seeds or what the exact variety is): Another nice firm, crisp, mild heat radish, made great quick pickles (I expect the Scarlet Radish also would have).
  • Rattail Radish: Growing them this winter, they’re prolific and fast growing but haven’t put up the seed pods (which is what you eat rather than the root), so no “tasting notes” yet.

Every variety grew fast– looking back at my notes, last spring I started seeds indoors on 2/16,  they’d sprouted by 2/20, I transplanted some to 3″ pots on 3/5 (likely an unnecessary interim step for a radish), planted them outdoors on 3/12 (after a few days of ‘hardening off’– setting them outdoors but under an awning so they didn’t get direct sun), and was eating my first large radishes on 4/15.

Other things I learned / to remember:

  • Directly seeding them outdoors was hit or miss even though that should work in theory– the ones that sprouted grew just fine, but most never sprouted (eaten by birds? not staying moist enough? temperature?)
  • Light from an open window / windowsill was enough to sprout the seeds but not enough for the seedlings to grow more than about a centimeter (they ended up too tall and spindly as they reached for more light)– a grow light (with a fan to keep them cool) helped.
  • Because they grow so fast, I should remember to arrange them to the North of other seedlings in the raised bed so they don’t quickly shade and then crowd out the shorter seedlings.
  • Having too densely-packed earth or even small bits of gravel / rock in the raised bed some distance below the surface causes the radishes to turn, split, and contort in visually interesting but hard-to-peel ways… (see the fist-sized ‘Cthulhu radish’ picture above of this)


Caramelized Garlic, Kale, and Cheese Tart

28 Jan

The caramelized garlic tart in Ottolenghi’s Plenty is very good. I recently made a greener tart inspired by it that combined:

  • A basic butter pie crust, pre-baked until golden
  • Three heads of heirloom garlic cloves, caramelized with a little red wine vinegar (following the general process in the recipe above)
  • Gruyere and goat chevre
  • A whole bowlful of kale from the winter garden, chiffonaded and wilted / cooked down for a few minutes in a skillet
  • 4 eggs and a little milk and yogurt to fill the tart

It worked well for breakfast the next morning, too…

Nanakusa No Sekku (Festival of Seven Herbs)

13 Jan

I traveled with friends to Japan over the holidays and had a range of interesting meals, from many-small-dishes breakfasts to a few kaiseki-style set menus working through a formal progression of dishes, to excellent ramen in a museum, to dinners we cooked in a rental house in the mountains from the wide variety of product available in one of the markets.

We came home inspired to learn and try to periodically cook in this style, and with some special rice from the rural Noto peninsula where we’d taken a side trip.

IMG_20180107_164643

H read somewhere about Nanakusa No Sekku (the Festival of Seven Herbs), a meal traditionally prepared and eaten on January 7th involving seven herbs and rice porridge, and last weekend we took that as inspiration to do our own hybrid Bay Area version of that on the 7th.

We spent the afternoon before foraging for some of the meal’s traditional herbs in a park in the East Bay hills, finding chickweed and what we think was shepherd’s purse or at least a dandelion variant (top middle), as well as sorrel and miner’s lettuce (not pictured), but held off on foraging any water dropwort as there are many highly poisonous variants. And from our back yard / garden we collected young greens from daikon, mustard, shiso, and mizuna (all grown last summer from seeds or seedlings from Kitazawa Seed or Namu Farm):

IMG950248

We cooked most of these (except the shiso, saved for a garnish) briefly and combined them with rice porridge (rinsed rice + water in a 1:8 ratio, brought to a boil and then turned down to a low simmer and steamed, covered, for about 45 minutes), grilled salmon (marinated in yuzu kosho (a fermented mix of chili peppers, yuzu peel, and salt– not homemade, yet) and then grilled on high heat skin-down for about 8 minutes, then briefly seared on the other side), a vinegar and Meyer lemon pickled purple radish, and some umeshu:

IMG_20180107_180813

It was a comforting meal, with a bit of challenging bitterness from some of the herbs but a reassuring buttery heat from the salmon.

Braised Radishes in Miso Butter… and Soba in Broth

9 Jan

Another day, another need to use radishes from the backyard ‘winter garden’. I’ve pickled so often I was looking for something new (and not everyone wants a acidic, fiery pickle as often as I do…), and browsed a few articles about braised daikon like this one on Serious Eats.

My very similar adaptation was pleasantly successful– a tender texture with some radish flavor but without the normal bite, and a ready vehicle for a rich miso+butter sauce:

  • Peel and roughly slice some thick winter radishes (I used a mix of daikon and a purple Japanese radish whose name I don’t know)
  • Simmer in water for about 30 minutes
    • I included a tablespoon of rice in a tea strainer in the same pot– copied from an article above though without really thinking what it would be doing– making the water starchier because ______?
  • Drain and discard the water and rice, then cover the daikon with broth** and simmer another 15 minutes or so until at the desired tenderness
  • In parallel, mix 1 Tbsp of miso paste, 1 Tbsp of butter, 1 tsp vinegar (I used a white wine vinegar I’d made), and a few tsp water and briefly heat on low to make a glaze, adding a little water to get the consistently, then cover the drained radishes and serve.
  • Delicious!

**And in this case, this was part of a dinner where we also made soba in broth:

Broth: a savory chicken stock from the last time we roasted a chicken + kombu + dried porcini mushrooms + celery + carrots + onions + the radish greens, simmered on low for about 3 hours, then strained and seasoned with salt, soy sauce, miso.

Into the Broth: Soft-boiled eggs, flower-cut carrots, roasted baby carrots, sautéed broccoli, and soba noodles (boiled in water and drained in cold water).


Quick Pickled Radishes w/ Lemon Zest

3 Jan

IMG_20180103_192851I’ve made quick pickles many times– usually just soaking thinly-sliced vegetables in vinegar, but this simple variant turned out especially well so I’m jotting it down.

I started with a daikon and some sort of purple Japanese radish from the winter garden:

IMG_20180103_185153_1

I sliced them thinly and tossed them with a few tsp of salt, massaging/mixing them with the salt again after 5 minutes. After about 10 minutes the salt had drawn a large amount of moisture out of the radish slices, and I quickly rinsed them and patted them dry.

I then covered them in a little white wine vinegar and Meyer lemon zest and let them sit another 20 minutes. Voila! A nicely supple texture (firm but not as crunchy as a raw radish), fresh and tart with minimal bitterness.


Cornmeal Pancakes

10 Dec

For a less traditional savory breakfast, I enjoy the polenta-like, 100%-cornmeal, ‘Johnnycakes’ style of pancake with greens and eggs.

But for eating with maple syrup or a special occasion, I like a fluffy cornmeal-and-wheat-flour mix:

IMG_20171210_104747.jpg

IMG_20180303_102845 (1)

From a little bit of experimentation, my current favorite recipe goes heavier on the cornmeal (50/50 mix with flour) for flavor and texture, and includes either buttermilk or some yogurt. For a small batch of about 7 pancakes (2 people):

Mix together dry:

  • 1/2 cup cornmeal
  • 1/2 cup white flour (or 1/4 cup whole wheat + 1/4 cup white)
  • 1 T sugar
  • 2 tsp baking powder (or 1 tsp baking powder, 1 tsp baking soda**)
  • 1/2 tsp salt

Then add and lightly whisk in:

  • 1 egg
  • 1.5 T melted butter
  • 2/3 to 1 cup* buttermilk depending on the desired texture
    • I’ve also had success substituting a 50/50 mix of milk and greek yogurt (without buttermilk you need something acidic to activate baking soda)

Pre-heat a skillet on medium-low (especially if it’s large compared to the burner, to ensure more uniform edge-to-center heat), cook batter until bubbles start to pop through on the top and the bottom’s browned, flip, cook a few more minutes.

For extra credit and a really fresh corn taste, use fresh-ground dried flour corn you grew in your garden:

IMG_20171119_114710.jpg

And then cook over a wood stove in an off-the-grid cabin:

IMG_20170930_093322.jpg

IMG_20170930_100817

* Side note: Varying the amount of liquid really changed the pancakes. 2/3 cup buttermilk made a thick, almost cornbread-like batter (shown on the wood stove above), which resulted in a delicious, thicker, slower-cooking pancake. We actually preferred the texture of this one that’s a step toward cornbread. On the other hand, 1/2 cup yogurt + a bit over 1/2 cup milk led to the pancakes at the top of this post– light, spongey, and fluffy (and faster-cooking).

** Side note: Some day I’ll read and experiment more to get to the bottom of the baking powder vs. baking soda question— it’s not clear to me why some recipes combine both baking powder and baking soda– if the recipe includes acidic liquid like buttermilk or yogurt, I’d think that baking soda should suffice, whereas if you’re using double-acting baking powder with any liquid, I don’t see why you’d also need baking soda…

Growing Garlic, Making Pesto

4 Aug

This year I grew garlic in the back yard.

It started with just three heads of an heirloom hardneck garlic variety ‘Music’ grown and seed-saved year after year by my parents.

I stored the cloves in the fridge for a week before planting (in case that helps with vernalization in our mild winter climate– unclear), then planted them in a raised bed in January (about an inch down, 4″ apart):

IMG_20170116_103449

Three weeks later, they’d sprouted:

IMG_20170128_155435

By mid-spring every clove had grown into a healthy-looking plant:IMG_20170319_175001 (1)

In May the garlic started putting out scapes, these smooth, curving shoots with the beginnings of bulbs at the end. These could become the garlic flower…IMG_20170524_200132_599

But instead we harvested them, to leave the garlic growing underground and also to cook with:IMG_20170524_193715

They make a delicious, spicy pesto (with some parsley, olive oil, pepitas, parmesan, and salt) that we ate that night and froze (in an ice cube tray) for future meals:IMG_20170524_200536

IMG_20170726_193342_638.jpg

IMG_20170524_201058.jpg

By early July, the garlic was showing signs of being ready to harvest– the tops were about half brown and dead:

IMG_20170708_102253

I picked a test bulb (each of the 12 cloves planted grows into a whole new bulb) and checked it out. Good external paper beginning to peel off:

IMG_20170630_164054

Pretty good internal form: individual cloves, each in a papery skin. Perhaps still a bit thin/moist? I decided to leave it another week or two.

IMG_20170630_165932

In mid July, I picked the rest:

IMG_20170708_203958H braided them and we hung them up outdoors to dry for a few weeks before moving them to the kitchen:IMG_20170709_205438 (1)

And at last, our first batch of basil pesto that used both basil and garlic from the garden:

IMG_20170630_164754.jpg

IMG_20170630_171239