Archive | BBQ RSS feed for this section

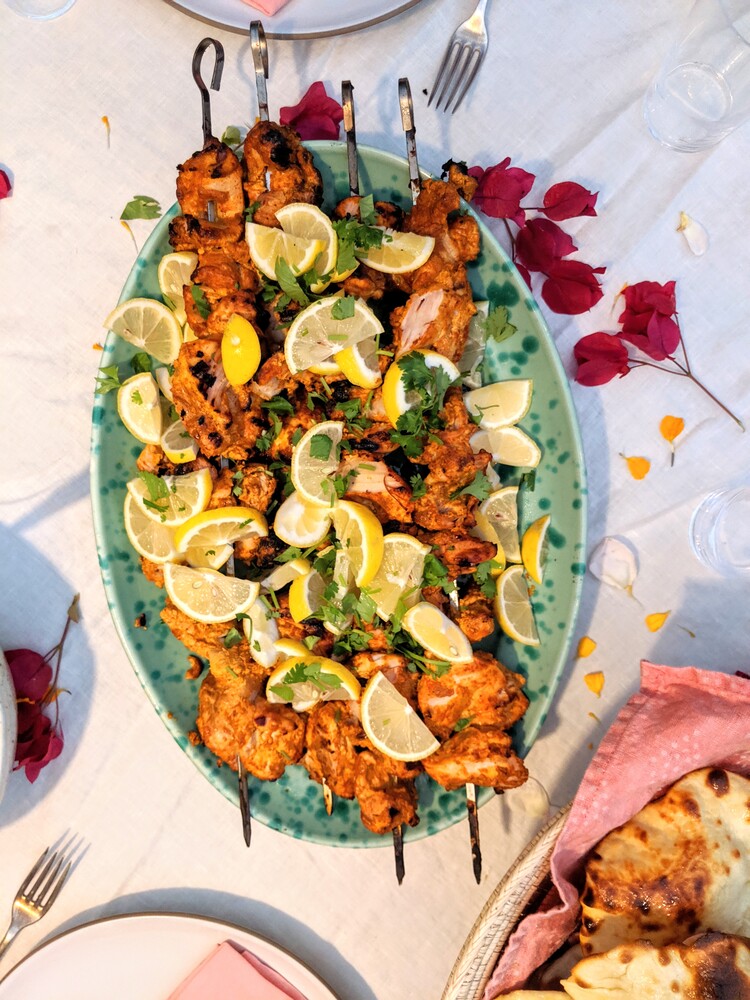
Tandoori Chicken in a Charcoal BBQ

30 Nov

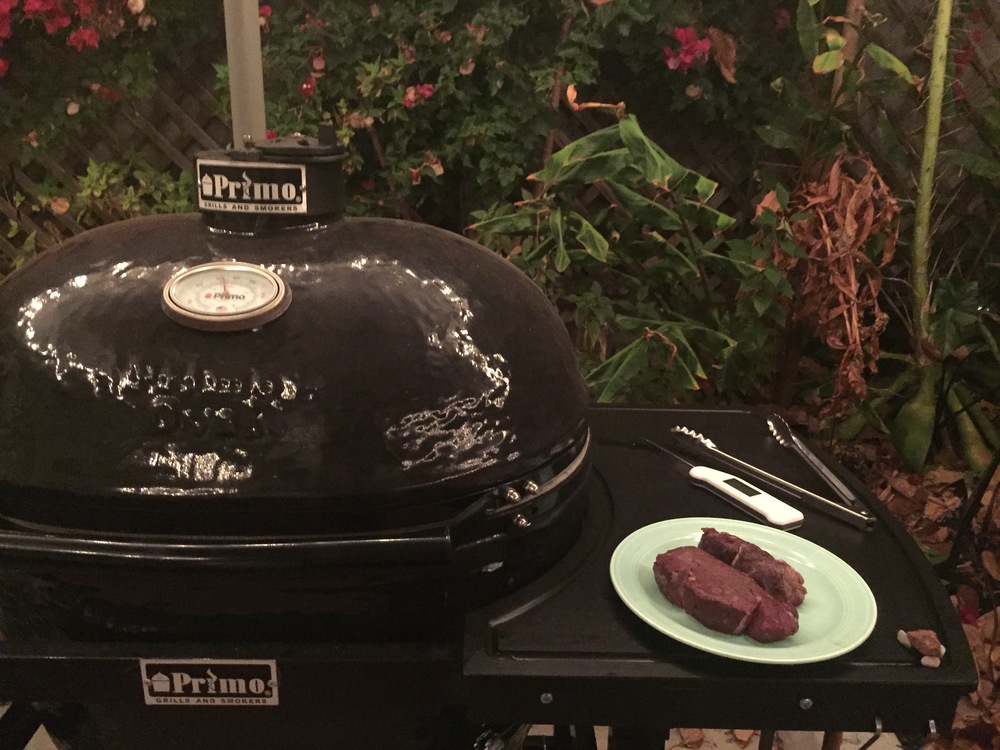
Earlier this fall I made some delicious tandoori-style chicken for an Indian-themed dinner party. This may be the best-tasting chicken I’ve cooked in a long time.

IMG_20190922_190114

I figured, I have a kamado-style ceramic-walled charcoal grill / smoker that can easily get up to 700 degrees F (which I’ve used to make pizza in the past)– there must be some way to use this as an approximation of a tandoor. I did some reading, and as often seems to be the case, there was an article by Kenji on Serious Eats on this very idea.

The keys seemed to be thigh meat (delicious, doesn’t dry out as easily if the temperature gets a bit high), heavy use of a thick yogurt-based marinade (continues to shield the surface and provide moisture), and fast cooking in a hot-on-all-sides grill/oven, above open fire that can give it some char.

For twelve people (as part of a feast with many other dishes), I made about 5 lbs of boneless, skinless chicken thighs.

The marinade:

Grind these spices together:

  • A few spices toasted in a skillet for 1-2 minutes:
    • 4 T cumin
    • 4 T smoked paprika
    • 2 T “extra bold Indian coriander seed”
  • 2 tsp turmeric
  • 1 tsp cayenne
  • 2 T achiote powder

Add:

  • 16 cloves garlic, crushed
  • 4 T ginger (microplaned)
  • 1 cup lemon juice
  • 4 cups yogurt
  • 1/2 cup(!) salt

The marination:

I slashed the surfaces of the chicken thighs deeply with a knife (to make it easier for marinade to penetrate), and marinating them in the fridge for about four hours:

IMG_20190922_132007

The tandoor:

I started a fire in the grill/smoker about an hour before cooking, to give it time to burn down the coals and heat up the entire chamber, I had the grill temperature stable around 600-650 degrees by the time I was ready to cook. The chicken did end up sticking a bit– I could have better-oiled the grill.

I pulled the chicken out of the fridge 15 minutes before cooking to let it warm up a bit, then put the skewers (still dripping with the thick yogurt sauce) on the grill and lowered the top so they’d cook from all sides…

IMG_20190922_182218

At this high temperature, they only took about 12 minutes to cook (I flipped them after 7 minutes, then checked the appearance and internal temperature a few times after that– looking for about 165 degrees for these thighs). Beautiful!

IMG_20190922_183902

With such a short cooking time, some of the tangy spiced yogurt was still moist on the outside of the chicken– different from what I’m used to in restaurants, but delicious– and the chicken thighs hadn’t dried out at all.

We served this with a pile of lemon wedges and fresh cilantro, alongside freshly-made garlic naan, saag paneer by H with homemade paneer, deep-friend pakoras, and multiple types of daal and homemade chutneys– a great evening eating outdoors with friends…

Pizza on a Charcoal BBQ

18 Nov

(quick notes, mostly jotted down to remember what worked well)

My third try in three years, and the most successful (I got the grill up to 700 degrees, which I’m sure helped):

IMG_8469

Grill setup: plenty of charcoal below, all air passages cleared of ash, and a pizza stone (porous side up for my glazed/porous stone) raised on two bricks to bring the pizza close to the hot lid of the ceramic grill. I let the charcoal burn for 90 minutes with the lid closed to get the entire grill up to 650-700 degrees (when I tried making a pizza earlier, it burned on the bottom before it fully cooked on the top– I think because the ceramic grill lid wasn’t hot enough– I could also try further raising the stone next time).

IMG_20181103_173221

The dough recipe is down at the bottom. After letting it rise overnight in the fridge, I pulled it out about an hour before the grill was ready and rolled out each crust on a floured board before transferring it to the peel (on a layer of coarse cornmeal), rubbing olive oil into it, sprinkling a little salt onto it, and then topping it.

IMG_20181103_171743

Each pizza only had to bake for 3 or maybe 4 minutes when the grill was at peak temperature (later in the evening the charcoal burned down and the grill dropped to 500-550 degrees– the pizzas still came out pretty well).

IMG_8463

IMG_8470

IMG_8471

IMG_8473

We made 6 different pizzas in one evening for a small cocktail party with a group of friends– success!

Dough recipe (6 small pizzas, enough for 6-9 people):

  • 690g white* flour
  • 255g whole wheat flour
  • 21g sugar
  • 15g salt
  • 15g yeast
  • 690g lukewarm water
  • 48g olive oil

(*usually King Arthur bread flour, but this time I used a 50/50 mix of bread and all-purpose because I ran out of bread flour)

Mix all the dry ingredients except the yeast.

Make a small depression in the middle of the dry ingredients and add the yeast there.

Gradually pour the water/oil mixture into this depression, stirring in a small circle to dissolve the yeast and to gradually incorporate the flour into this.

Turn the (quite wet and sticky) dough out onto a floured countertop and knead a dozen times.

Place in an oiled bowl, cover with plastic wrap, let rise overnight in the fridge (take it out at least 15 minutes before making pizzas and divide it into 6 balls).

Grilled Pizza

28 Mar

Still working on getting a pizza stone hot enough and where exactly in the grill it and the fire should go, but these were good…

IMG_20170327_192051

Using my father’s some-whole-wheat-flour high-moisture-content long-rising dough recipe:

IMG_20170327_200102Butternut squash, red onion, buffalo mozzarella, gremolata:

IMG_20170327_201437

Tomato sauce, anchovies, bitter greens, salted olives, chili flakes:

IMG_20170327_203839

Pesto, ricotta, asparagus:IMG_20170327_205546

New Year’s Day chilaquiles and carnitas

2 Jan

The best part of having leftover pulled pork and salsa from New Year’s Eve dinner?

New Year’s Day carnitas chilaquiles (tortilla chips soaked in tomatillo salsa, topped with fatty pulled pork that’s been crisped under the broiler and mixed with a little orange juice, and a fried egg):

img_20170101_143605


BBQ pork tacos with smoked salsas

1 Jan

For a small New Year’s Eve party, a meal cooked primarily in the smoker (tacos with pulled pork, homemade tortillas, and salsas made from smoked tomatillos and pineapples):

img_20161230_153839img_20161231_200607

23-hour slow-smoked pork shoulder:

  • A roughly 7lb chunk of pork shoulder (a.k.a. pork butt) from Niman Ranch
  • Dry rubbed with copious amounts of salt and mustard, smoked paprika, and black pepper and let rest in the fridge for 4-5 hours
  • Smoked very low-and-slow at 215-225F for 23 hours over lump charcoal with some fist-sized chunks of apple and pecan wood for smoke, until the internal temperature was in the 195-200 range (for overnight smokes I have a ‘baby monitor’-style wireless temperature probe I rest on the bedside so an alarm will ring and wake me up if the pit temperature gets too high or low and I can adjust the airflow or add fuel)
  • No intermediate basting, mopping, foiling, etc– just keeping it simple
  • Wrapped in foil and let rest for 45 minutes
  • It was so tender I could pull off strands by hand, and with a nice ‘bark’ and smoke ring…

img_20161231_134805It didn’t even need any sauce– I just squeezed a few limes over it.

Smoked tomatillo salsa, a puree of both smoked and raw ingredients:

  • 8 large tomatillos, smoked/roasted at about 225F for two hours
  • 3 cloves garlic
  • 1 whole jalapeno
  • 1/4 of a large white onion
  • Juice of 1/2 a lime
  • 1 Tbsp sugar
  • Salt and minced cilantro to taste

I’ve tried a few ways of using smoked tomatillos and this is the highlight for me– I’ve even frozen excess in ice cube trays to save for later:

IMG_20161217_102407.jpg

Smoked pineapple salsa:

My friend judit turned me on to how well smoking treats pineapple– the low slow cook caramelizes it, and this sweetness helps balance the woody smoke.

I started by slicing two pineapples into discs and smoking / roasting them at 225F for two hours (at the same time as the tomatillos and pork– in the initial, smokier two hours). I pureed:

  • One of the pineapples
  • 4 cloves roasted garlic
  • juice of 1 lime

And then added for texture/contrast:

  • The other pineapple, somewhat coarsely chopped
  • 1/4 of a red onion, finely chopped
  • salt to taste

The meal turned out really well, if I may say so myself.

Plus, we had a lot of tomatillo salsa and pulled pork left over the next day for breakfast…

Reverse Seared Steak

18 Nov

After years of successfully cooking steak in a traditional way (salted a few hours ahead of time, then high heat on a grill or a skillet on the stovetop followed by a 5-10 minute rest), I gave the “reverse sear” technique a try.

The general idea is to bake / roast the steak at lower temperature until it’s almost done, then sear each side on a hot grill. The slower, lower-temperature approach should gradually and uniformly cook the meat, while the sear browns the outer layer for flavor which maintaining the juicy center (especially on a thick steak).

After trying this a few times, a simple weeknight compromise in the level of effort that works for me is to set up a grill for indirect cooking (fire on one side, steaks on the other) at around 275, roast the steaks with the lid closed until they’re at 115-120F internal temperature (20-40 minutes depending on thickness), take them out to rest while I open the vents and crank the grill up to high temperature (500F), then sear a minute or so on each side (final internal temp 125-130).

img_8657

The end result of the best attempt– beautifully done, tender, and delicious:img_8659img_8663

I wouldn’t say I’m a convert to *always* cooking it in this way, or am convinced it automatically makes a better steak– but it works well and does give a bit more latitude in the timing, where plus or minus 1 minute doesn’t rapidly take you past medium-rare.

In the future I’m curious to combine this with some fruit woods as a way to lightly smoke a steak, since it’s in the grill for longer than a traditional hot-seared steak.

Smoked Trout, Homemade Bagels

8 Aug

IMG_7927

I threw a little brunch for friends, with homemade bagels, salmon and trout I smoked over alder wood, gravlax cured by H, dry farmed early girl tomatoes (so good…), salted cucumbers, and other accoutrements.

For the bagels, I mostly used the tried and true recipe, though I tried retarding the dough (letting it rise slowly in a cold place overnight) in both a typical 40°F fridge and a special 55°F fridge I had set up with a temperature controller for fermenting experiments. The 40° dough rose less, but then swelled up when baked (see left bagels below– perhaps I didn’t boil them long enough this time?) They still tasted good, like bagels– but the dough retarded at 55° had an especially nice crackling crust around a chewy bagel. I’ll keep playing around with rising times and temperatures…

IMG_7909.JPG

For the trout and salmon I followed a four day “hot smoke” process based on the Russell Smallwood / Naked Whiz recipe. This produces savory, rich, cooked salmon and trout with a bit of a chewy crust– not a smoked cold/raw salmon like lox.

Wednesday evening I made a plain salt brine (I wanted to start with the basics this time before getting into spices, herbs, or sugar) and immersed a thick 2lb block of salmon and 2lbs of cleaned trout fillets (both skin-on) in it under weights overnight.

Thursday morning before work I rinsed the brine off both and set them out uncovered in a fridge to air dry for 36 hours, in the hope of developing more of a skin/pellicle when smoked.

IMG_7877

Friday night I fired up the kamado-style ceramic grill/smoker with lump charcoal and a few chunks of alder wood and stabilized it at the low temperature of 180°F (this took some effort and required sealing every spare crack of inlet space with foil to control the airflow). After one false start when I closed down the vents so much that I snuffed the fire, I got a steady slow burn going and popped in the salmon and trout. I let them smoke until 2AM (about 6 hours), which led to a heavily cured toothy smoked trout with a great skin, and a moderately cured salmon that was fully cooked but still moist in the middle (the salmon was much thicker to start– but I didn’t want to be getting up all night to check on it– maybe next time I’ll try a 12-hour smoke).

IMG_7889

I chilled the fish overnight, and Saturday morning they were ready to go for brunch. Mmm.

IMG_7933 (1).JPG

There were plenty of smoked fish leftovers (though not as many as I expected making 5 lbs of fish for 9 people), and mixing it in to scrambled eggs with feta is my favorite leftover use so far…

I think the trout turned out amazingly good and have been snacking on it for days– I wouldn’t change anything. The salmon was also very good, but next time I want to try some more herbs and spices in the brine and perhaps a little sugar– and try smoking a part of it even longer to see if I can get a bit more of a dry “salmon jerky” crust outside the moist interior.

Smoking Brisket (on a small charcoal grill)

9 May

Two Hour Tacos? Why not Ten Hour Tacos, with a slow-smoked brisket, hand made tortillas, pickles, and a creamy BBQ sauce?

IMG_20150503_215032

We threw a dinner party inspired by a weekend trip to Far West Texas, and this is the story of the brisket.

I’d never actually smoked meat before, though I knew the general principle of indirect heat / “slow and low”. It became clear it wouldn’t just be a “set and forget it for 8 hours” process, and that there was a whole range of intuition, tweaking of the fire, and experience needed to get a good smoke. Well, there’s no real way to learn but by doing… so after browsing various online forums and getting pointed at this Saveur article, I had a general plan.

IMG_20150509_164115077

I’d use a charcoal grill with the coals on one side and a pan of water on the other, a whole 5lb brisket with the fat still on, with lid vents above the meat to draw smoke across it, while adjusting temperature primarily with the bottom vents to try to keep the smoker between 200 and 250F. Since I didn’t have good intuition (or experience with the grill I was going to be using), I splurged on a dual probe wireless thermometer where I could leave one probe in the brisket itself and another in the air within the grill/smoker, to let me know when the temperature was getting too high or low:

image6

I also spent a few evenings before the weekend  getting sucked into web sites discussing the pros and cons of different styles and types of wood (for example: “Amazing Ribs: The Zen of Wood“) and even the Wikipedia page on charcoal itself. I settled on a common approach of using charcoal for the steady heat (since the porosity and composition of charcoal makes it much easier to adjust burn temperature by modulating airflow, compared to wood which would burn hot and fast), combined with a handful of wood chunks to produce the smoke (not chips which would require too frequent replenishment over what I expected to be an all-day affair). For the wood I chose a mix of mesquite for traditional flavor, cut a bit with milder hickory and sweeter applewood as there seems to be active debate whether an all-mesquite-wood smoke imparts too much bitterness over a long slow smoke like a brisket.

Many hardware stores only carried charcoal and wood chips, but I found chunks of mesquite at the Cole Hardware on Mission St, and the OSH in Berkeley had an impressive entire aisle of wood chunks and chips of various types. For future smokes– I also read about BBQ Galore in San Rafael and Lazarri’s in Bayview (SF), though Lazarri’s is only open weekdays and I didn’t have time to make it over.

IMG_20150502_202429348_HDR

The night before the smoke, I made a dry rub for the brisket (I considered keeping it salt-and-pepper-simple for my first time, but ended up with a light rub mostly from that Saveur article– salt, pepper, paprika, brown sugar, mustard, cumin, coriander, and thyme):

IMG_20150503_102325261_HDR

The next morning, I was ready to go. After a few hours letting coals burn down and fiddling with the fire (the inlet vents on the old Weber were rusted open, making it hard to restrict oxygen flow enough to get the temperature down below 300F, which would have been disastrous for slow-cooling– eventually I wedged sheets of foil into each inlet vent which I could move side to side with a chopstick to control airflow) I was able to toss on wood chunks and the brisket and start the smoke. A few hours from the course of the next 6 hours as I fiddled with airflow and added wood whenever the smoke died down:

image9

IMG_20150503_124816839 image11

Out of curiosity, I kept notes on the temperatures of the smoker and the internal brisket temperature over most of the day–  here’s a graph of those notebook scribbles:

Screen Shot 2015-05-09 at 5.09.41 PM

Once the brisket hit an internal temperature of 160F, I took it out, poured half a beer over it, and wrapped it in thick aluminum foil before tossing it back onto the smoker. This helped it cook the rest of the way through and form a nice crust around the edge:

IMG_20150503_195941113_HDR

Finally, after 8 hours outdoors in the mild sunny Bay Area weather tending meat with a beer on hand, it was done. I let the brisket rest an hour still wrapped to reabsorb its juices, then opened up the foil and diced it into cubes for the tacos.

image16

Moderate success! It tasted great, with a strong but not overpowering or bitter smokiness, and when paired with some handmade tortillas, onion, cilantro, and barbecue sauce it was an excellent part of the meal:

IMG_20150503_210317761

The texture was certainly “chewy”– not unreasonably so, but not as tender as I’d imagined, so I still have plenty to learn…

Side note– the barbecue sauce I made was a hit, so I’ll jot the recipe down here. As a Northerner I claim no authenticity, but it was loosely based on a few online recipes for Texas BBQ sauce that highlighted tomato + vinegar + sugar as the base:

  1. Saute half a diced onion in a substantial amount of butter (maybe 3 Tbsp)
  2. Add a bottle of ketchup, plus perhaps half a cup of cider vinegar, salt, pepper, cayenne, smoked paprika, cumin, and marash chili flake
  3. Puree with an immersion blender

I don’t have quantities as the spicing was done to taste, but the vinegar, paprika, marash chili, and butter in particular came together to make an interesting, rich sauce with a background of slow-burn smokiness.