Fermenting Fridge

21 Jan

This barely counts as a project because of how simple it was.

I wanted a fridge I could use for homebrewing in hotter months (keep beer at 60-70F, or cider at 50-60F), that I could use to homebrew lagers for the first time (control temperatures in the 35-55F range at different stages of fermentation), to slowly lacto-ferment vegetables (not really necessary, but to do longer, slower multi-week ferments around 60F even when it’s warmer), or even to retard bagels (rest in a cool place overnight to slow yeast growth while allowing lactobacilli a head start).

I’d read a bit about DIY ways to replace the thermostat on a conventional fridge… and then dug up a much easier way.

img_7744
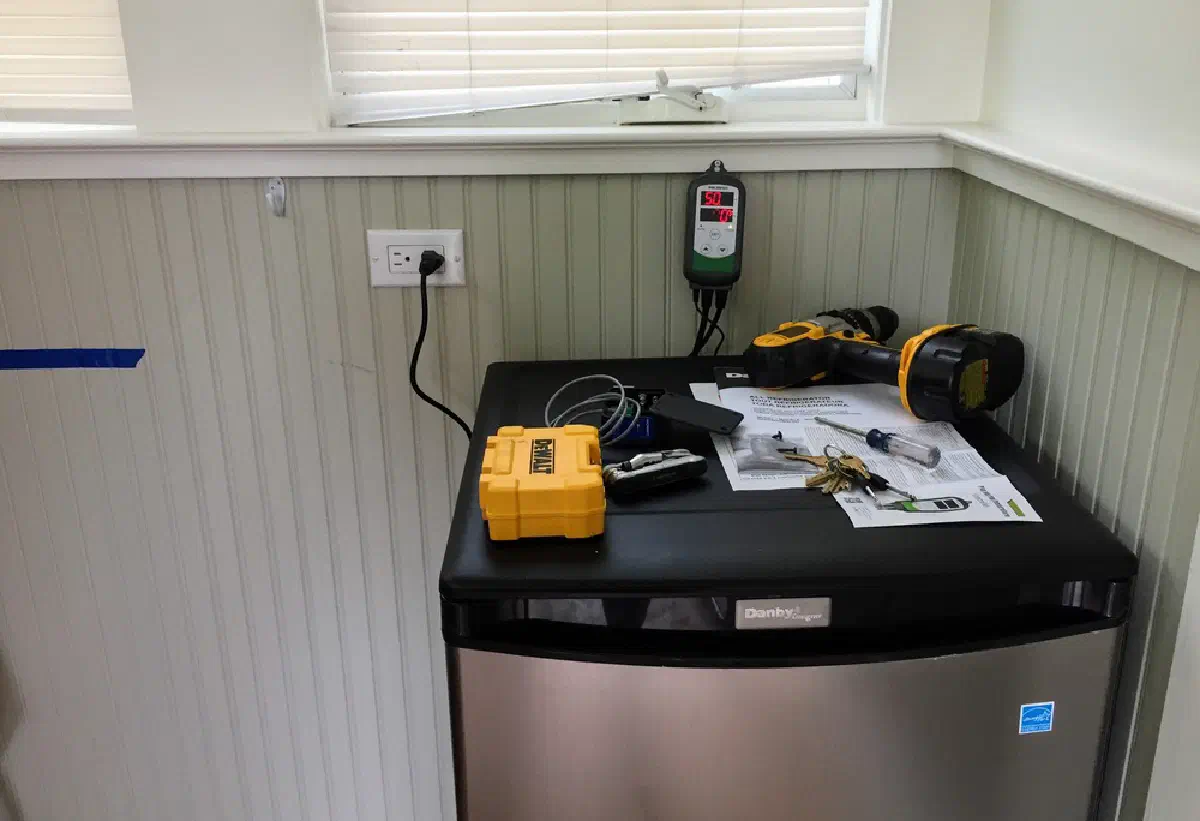
I bought a Danby DAR044 Compact Refrigerator (price varies, about $180 when I bought it) and an Inkbird Temperature Controller ($35).

The Inkbird temperature controller is a simple pre-wired alternative to custom temperature control relay boxes many people build– it has a temperature probe and two outlets, and turns on whatever’s plugged into the “heating” outlet whenever the temperature is below a certain setpoint, and turns on whatever’s plugged into the “cooling” outlet whenever the temperatures above a different setpoint.

I just plugged the mini-fridge into the “cooling” outlet, with the temperature probe threaded up through an existing hole in the back rear of the minifridge that leads into a drip tray. You remove these two screws to remove the drip tray:

img_7740

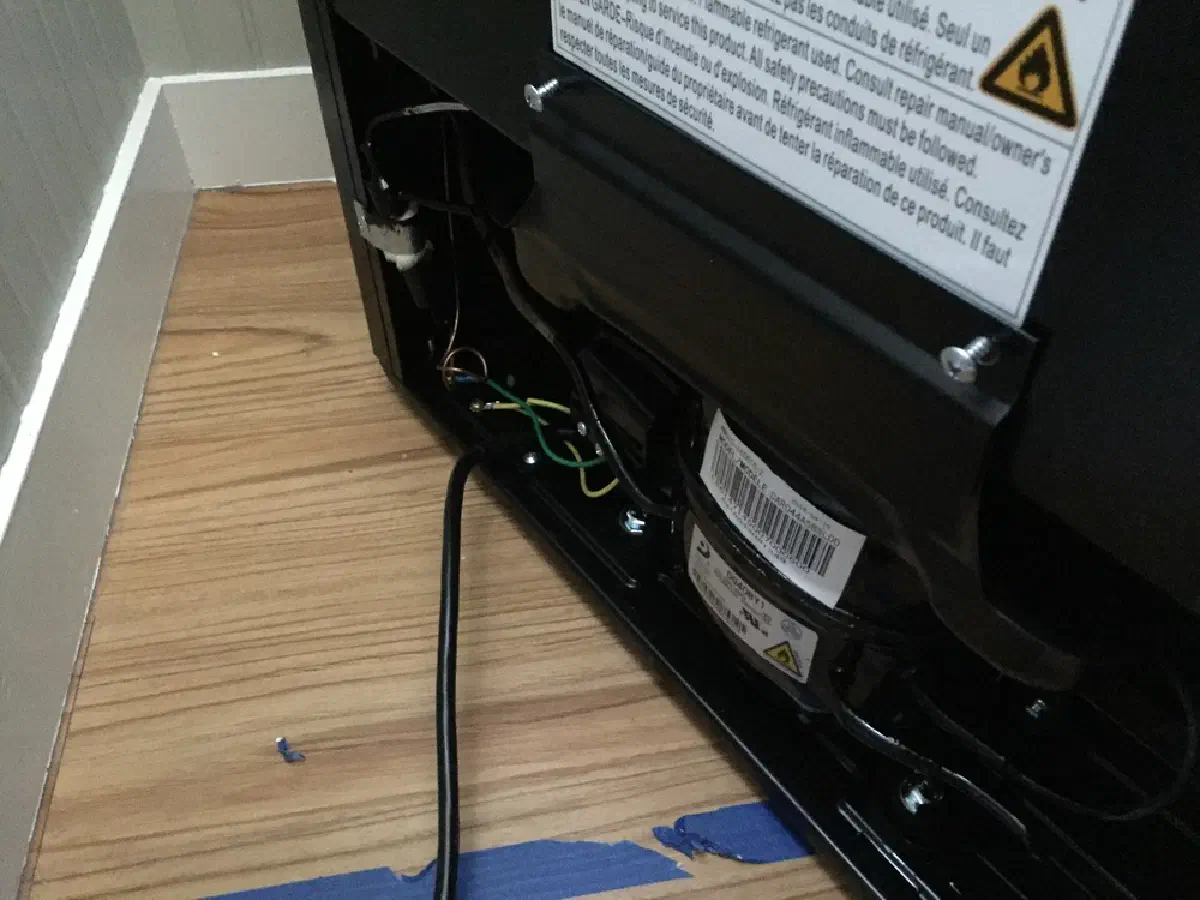
And use a drill to slightly enlarge the drip hole from the outside and fish the temperature probe up into the fridge:img_7742

That’s it. It just worked.

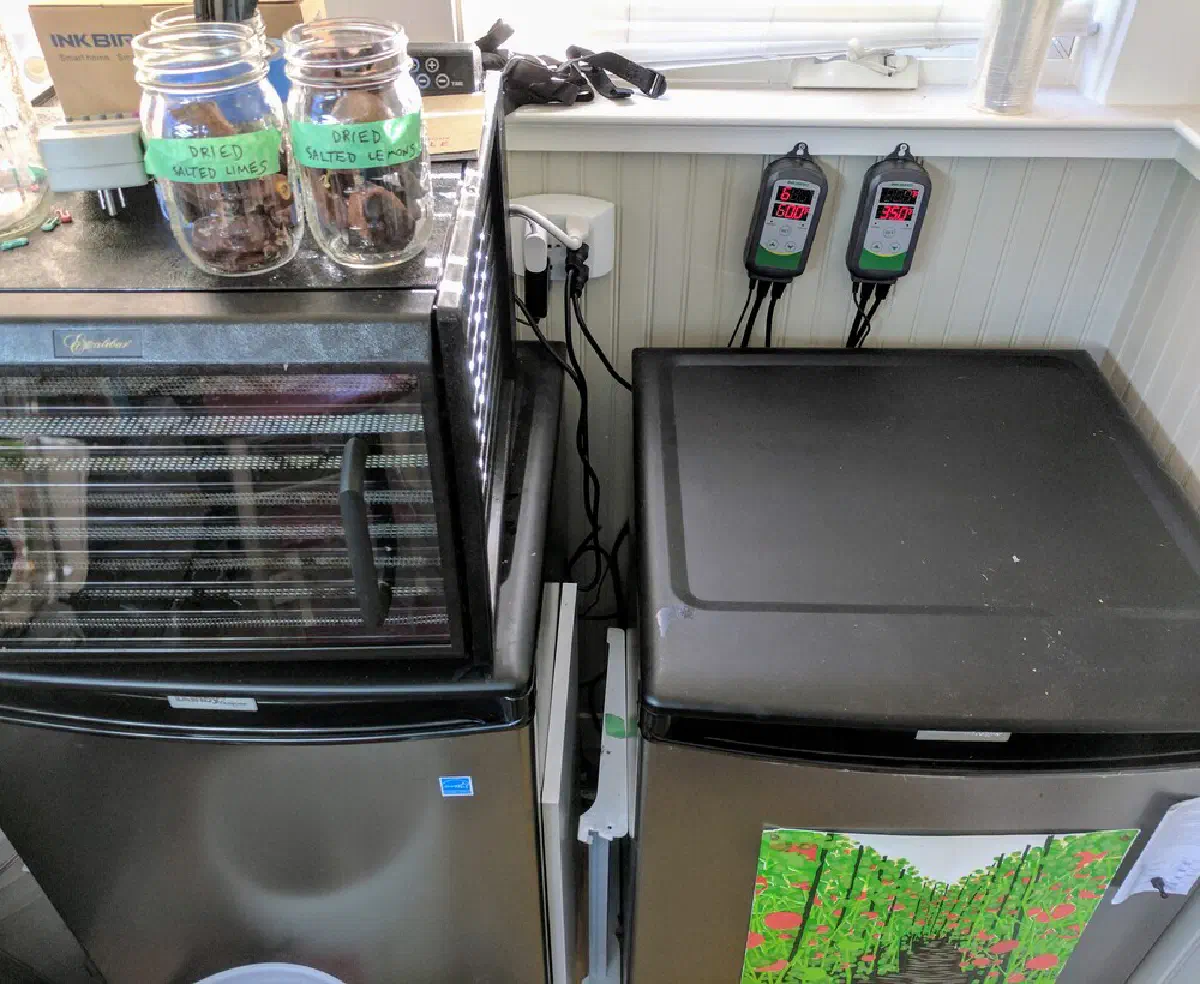
It worked so well I set up a second fridge, so I could be fermenting beer or pickles in one (at 60-65F) while lagering or long-term storing fermented vegetables (or keeping beer cool) in the other at 35F.

IMG_20170312_162800.jpg

As one example, here’s the temperature of the fridge over the course of brewing a lager– at 55F for the first few weeks, raised to 65 for a few days, then lowered to lagering temp at 35…

screen-shot-2017-02-26-at-7-38-08-pm

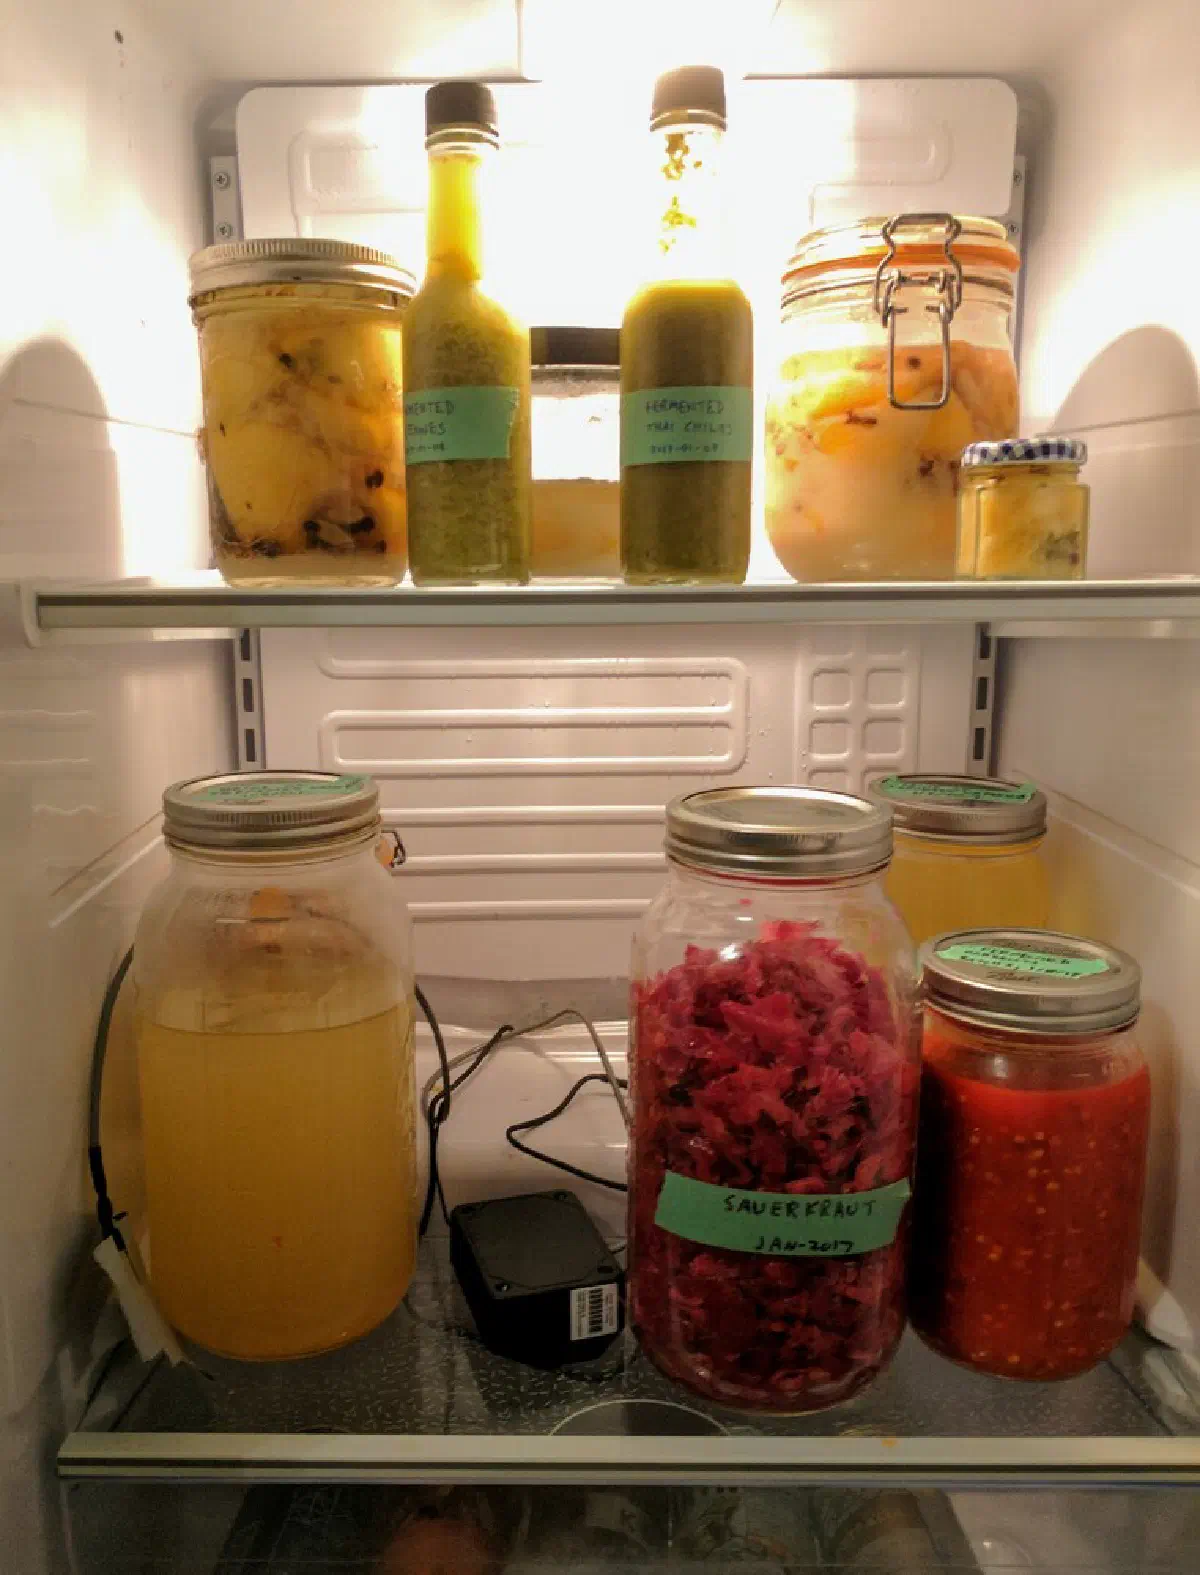
And typical contents: fermenting chiles, preserved lemons, and sauerkraut:

img_20170108_185232

7 Responses to “Fermenting Fridge”

  1. Eric February 9, 2019 at 11:10 am #

    Cool! I have the same fridge. Due to space limitations, I’m looking to make a fermentation chamber that could double as a lagering fridge. Your link to the InkBird thermo is dead. Can you please repost a link to the correct unit?

    • max February 9, 2019 at 11:30 am #

      That would work, I use my fridge for both! It’s the Inkbird ITC-308.

      • Eric February 16, 2019 at 9:02 pm #

        Thanks for the insight. I just installed the Inkbird controller as you described. Way easy! Quick question: are you using anything for the heating side, or do you only use cooling with your setup? I’m also wondering why you opted to set up two fridges. One warm, one cold?

      • max February 17, 2019 at 6:42 pm #

        I just use the cooling half, since the room it’s in is basically always 60 or above, but I could see adding a small heater or light bulb if it were Ina
        cold room– and I built two just to be able to occasionally lager or cold crash one beer while fermenting another ale/pickles/etc at 60.

  2. Eric February 21, 2019 at 9:31 pm #

    Got it. Thanks again!

    • Eric February 22, 2019 at 8:37 am #

      One more question: for lagering (at around 35 F), where do you set your fridge’s built-in thermostat? The coldest setting (right/clockwise), warmest dial setting (left/ccw) or somewhere in the middle? Also, do you set a delay on your Inkbird (e.g., 10 min) and what temp range do you set before the Inkbird kicks on (+/- 1, 2, etc).

      Thanks for answering all my questions!

      • max February 23, 2019 at 7:12 am #

        I always leave the fridges’ thermostats on the coldest setting, with the idea I’m now using the inkbird to control the temperature (but the inkbird can’t make the fridge colder than whatever the thermostat is set to), as long as I’m not seeing ice. And yes, good point, I use a delay and a temp range to keep the compressor from rapidly turning on and off if it’s right on the edge of the target temperature, I think I use 15 minutes and +-2 degrees but there’s nothing magic about those.

        (and sure, I’m glad people find this useful, I’m never sure if anyone reads it)

Leave a Reply

Fill in your details below or click an icon to log in:

WordPress.com Logo

You are commenting using your WordPress.com account. Log Out /  Change )

Facebook photo

You are commenting using your Facebook account. Log Out /  Change )

Connecting to %s

%d bloggers like this: